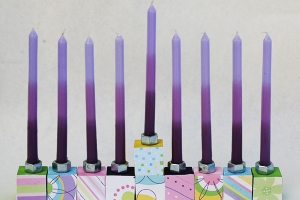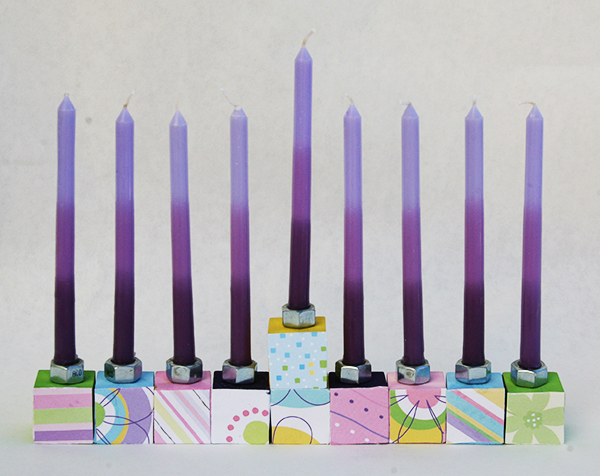
Get the kids involved in decorating for Hanukkah by designing a menorah with wooden blocks.
Discussion Points for Parents/Teachers
- Talk about Hanukkah family traditions.
- Talk about the symbols of Hanukkah and what they mean.
- iscuss color, symmetry and patterns.
Supplies
- 10 one-inch wooden blocks
- Tempera or acrylic paint
- Paintbrush
- Paper plate for paint
- Paper to cover workspace
- Water cup (to rinse brush)
- White glue
- Colorful, patterned cardstock or scrapbook paper (optional)
- Gems or decorative stars (optional)
- Cool melt glue gun with glue sticks
- 10 3/8-inch metal hex nuts
- Hanukkah candles
Directions
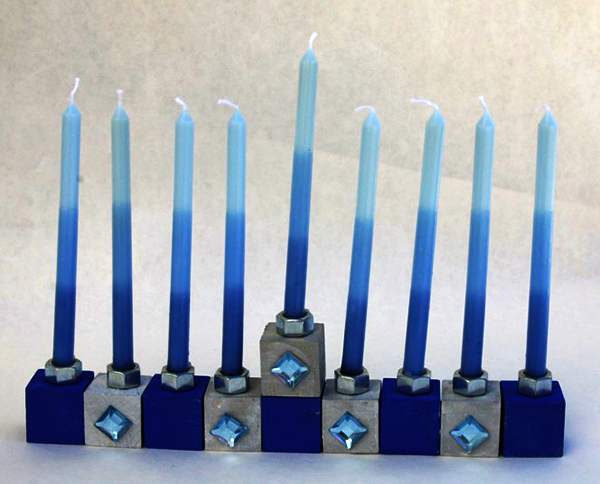
- Paint the blocks in colors of your choice. Note: for this project, one menorah was done in traditional blue and silver; the other in bright colors that match the scrapbook paper.
- Allow blocks to dry.
- (optional) If decorating with scrapbook paper, cut the paper in one-inch squares to fit the front of the blocks. Adhere with white glue and let dry.
- Glue nine blocks together in a row. Glue the tenth block on top of the center block (fifth from the end) for the shamash (main candle used to light the other candles). If using white glue, wrap a strip of painters tape around the entire row of blocks to hold it together until it dries completely.
- Use glue gun to adhere one hex nut to the top of each block.
- (optional) For blocks that are painted only, decorate the front of each block with a gem, star or other decorative element.
- Place candle in each hex nut.
Tips
- Find wooden blocks at your local craft store.
- Buy hex nuts at a hardware store.
- Hex nuts come in many sizes. To ensure your candles fit, take them with you to the hardware store when you get the hex nuts.
Alyssa Navapanich is an award-winning elementary art teacher in Lemon Grove (east San Diego County).
________
